Your Guide to Long Distance Backpacking, Backcountry Canoe Tripping, Hiking, Outdoor Gear and Adventure

Month: January 2018

5 Tips for Planning your First Solo in the Backcountry

Has backpacking or camping by yourself always been a life dream of yours? Does solo adventure seem a bit intimating to you? I hope that by taking you through why soloing is such a fantastic experience and by giving you some practical tips on how to prepare, you will be ready and confident to try out your first solo trip!


Why Solo Adventure is Totally Awesome: 

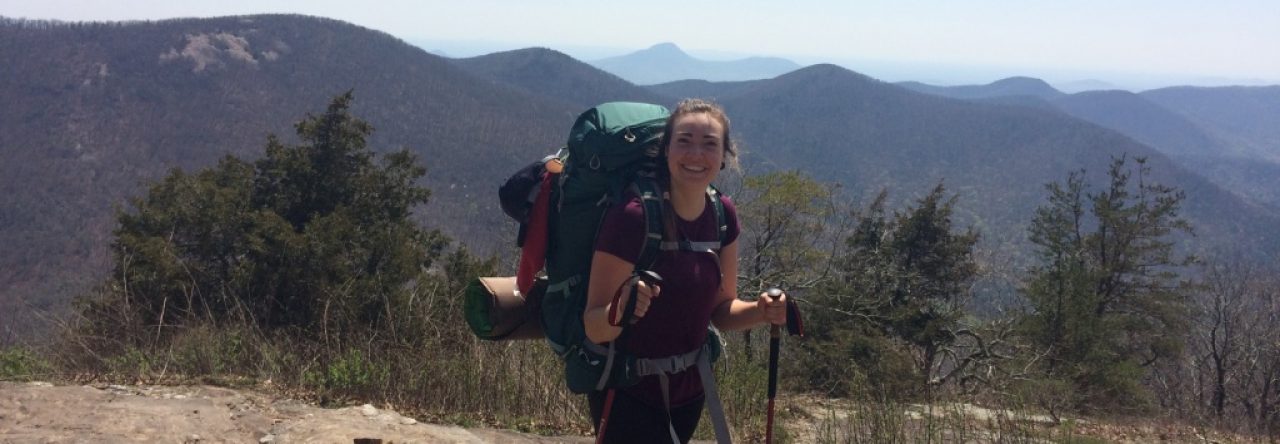
While I love to hike and camp with friends and family, I gotta tell you that my favourite experiences in the backcountry are the ones that I have done solo. I find that it allows you to build more skills in the wilderness because you are forced to act independently. Essentially, you are not relying on others to do tasks for you and you have to learn through trial and error and overcoming your own challenges. There is something so empowering about being able to navigate the backcountry with your own map reading skills, your own paddle strokes, and your own determination. I promise you that adventuring solo will give you more confidence in knowing that you are truly capable of doing anything you set your mind out to accomplish.

Recenter Yourself in Solitude
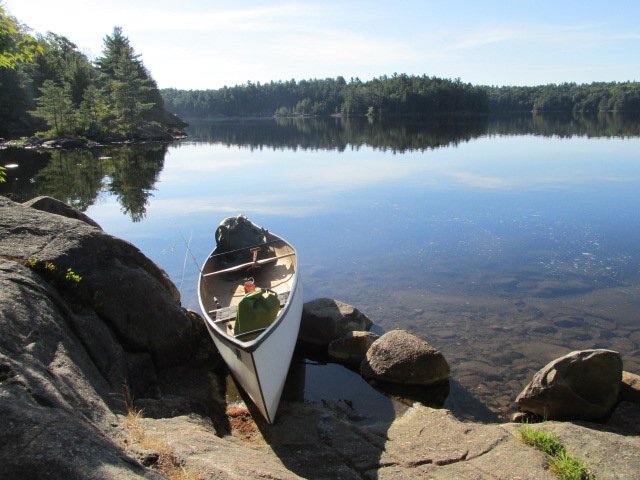
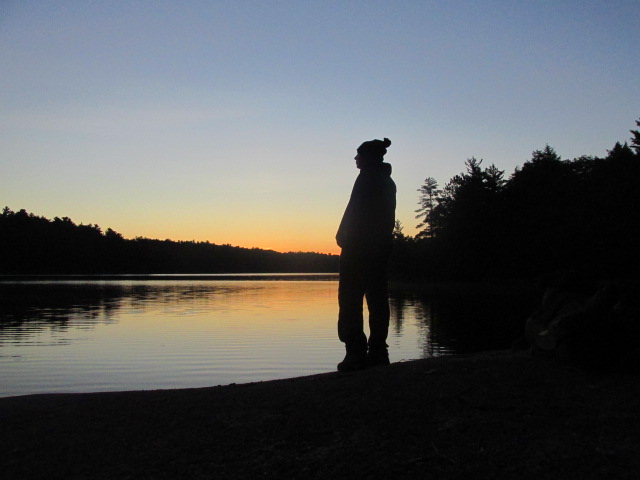
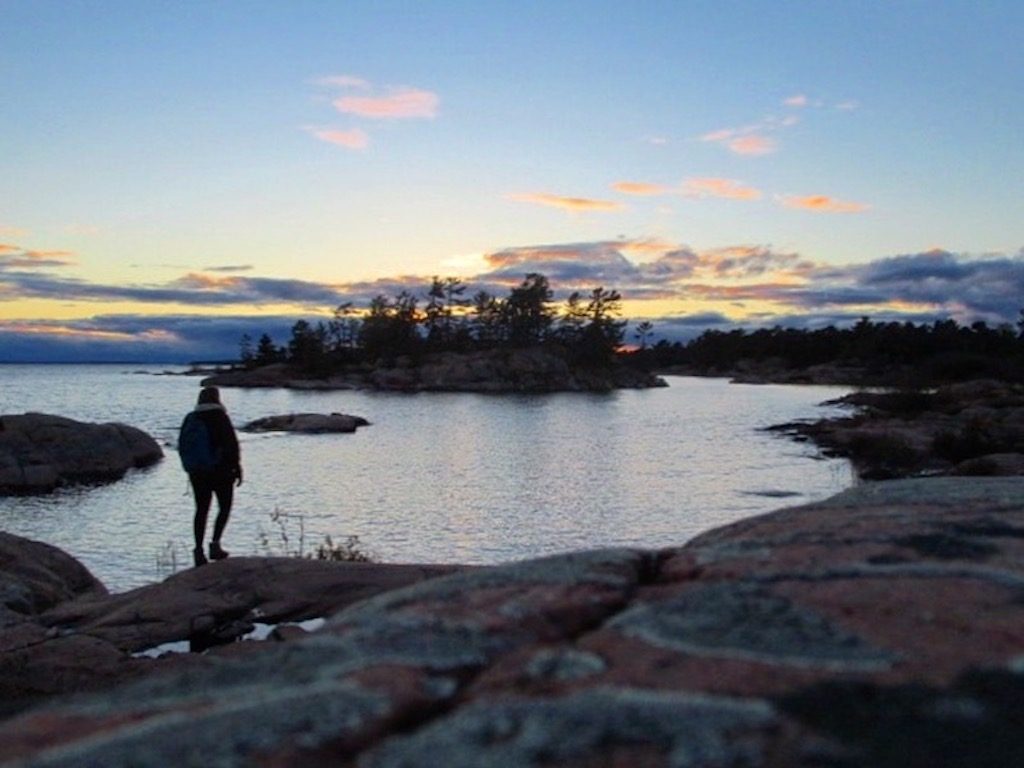
Being surrounded by nature in silence and truly soaking up the landscape and beauty around you can be a pretty neat experience. Spending time alone with your thoughts gives opportunity to focus and be fully present in the moment. The alone time can also be great in reflecting or sorting through some inner conflicts, decisions, feelings, that maybe you’ve been putting off dealing with. Solo trips can be the best opportunities to work on your own personal growth. I’ve found solo experiences can leave you feeling centred and refreshed. Afterwards, you’ll reflect on all you accomplished and you might think “Well, hell, I’m pretty bad ass aren’t I?”


Convinced yet? I want to take you through 5 tips that I learned through personal experience that helped me in starting to adventure solo:

1. Practise makes perfect
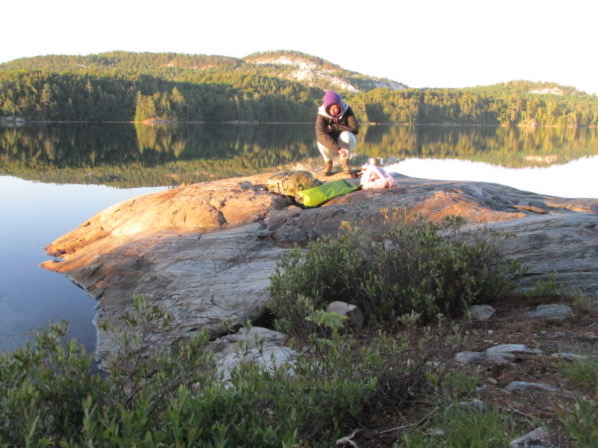
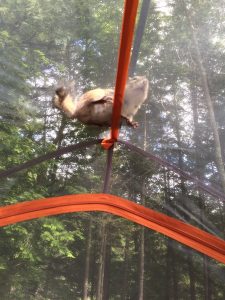
Believe it or not, the first time I ever camped solo was right beside ‘civilization.’ When I was much younger, I set up my tent in a field at my family cottage to help me practise and get used to camping alone. I remember that night very vividly as I was nervous and woke up many times during the night as every bump had me thinking there was a bear coming to say hello. This set up was perfect because it allowed me to dismiss these fears and get comfortable with camping solo in a safe environment. I recommend trying out solo camping in your backyard, at your cottage, on your friends property, wherever you are the most safe for your first experience. If it takes you more than one practise session to get comfortable riding solo, that’s perfectly fine, remember that there is no rush.


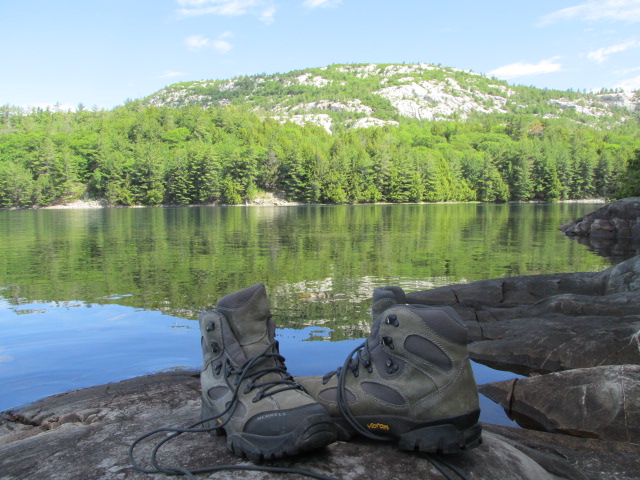
2. Test out your gear beforehand
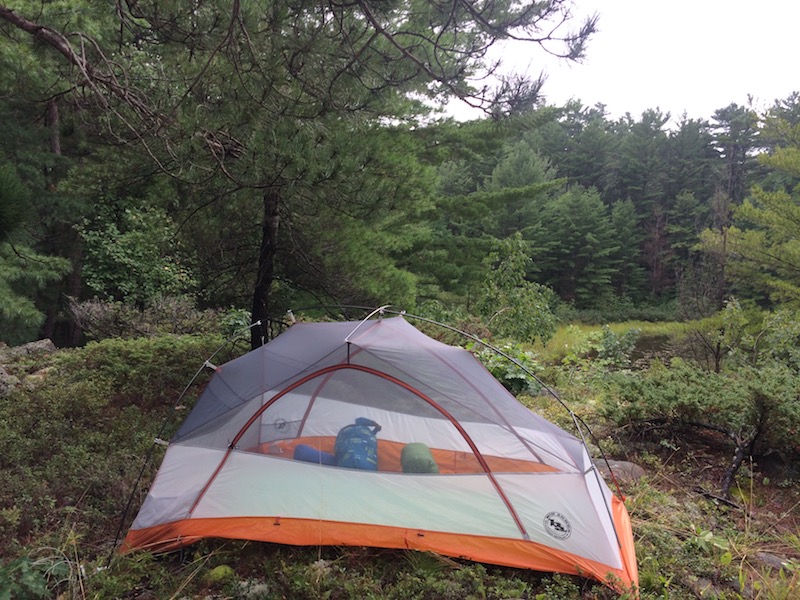
There’s nothing more stressful than bringing a brand new piece of gear out into the backcountry with no idea how to use it. No cell service means no internet to access YouTube videos on how to put together your water filter, or set up your tent. And whoops, you probably left the instruction manual at home. Make sure you test out all your equipment before you go, practise setting up your tent, using your portable stove, tying up a bear hang, anything you will need to know for your expedition. This will make you feel more confident and familiar with your equipment, and saves any last minute stress in the backcountry.

3. Ensure your first solo trip is an easy, accessible, and short route
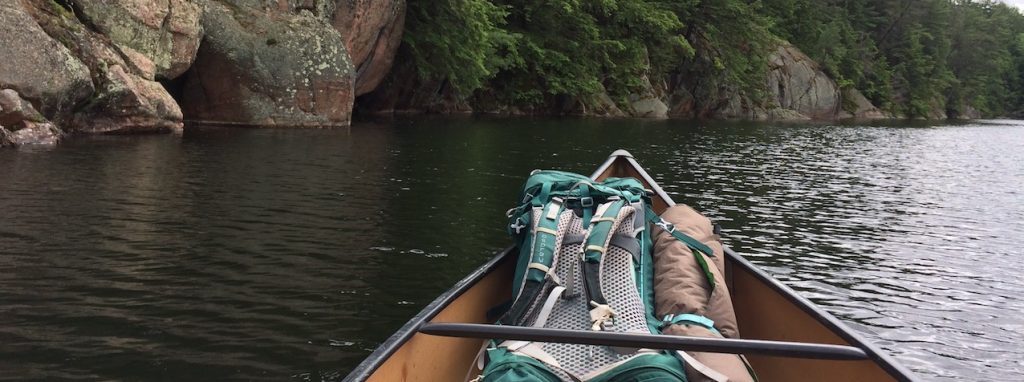
Be realistic with you limits and goals when starting out. 3 portages, 4 lakes to paddle, and a 5 night expedition is going to have you way over your head. While it’s great to have ambition, maybe plan that trip for when you have more experience in the backcountry. Having a super intense trip plan is only going to make you overwhelmed, not to mention puts your own safety at risk. My recommendation is plan a trip that requires a small amount of paddling, or hiking and a route that you are more familiar with. In addition, one or two nights will give you a shorter more doable timeframe. This will help you feel more comfortable in doing your first expedition solo.


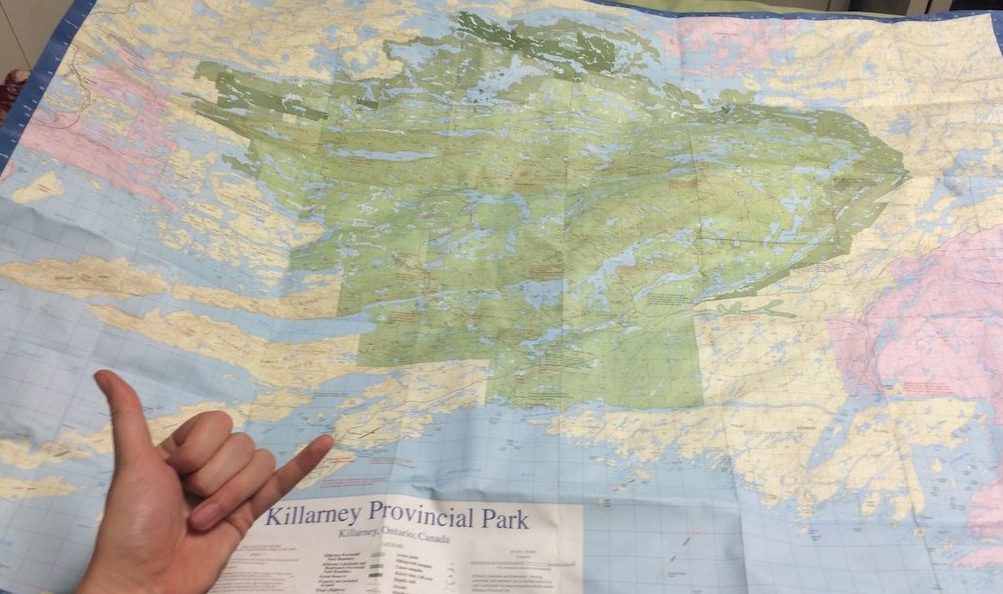
3. Research and trip plan
Before your trip, make sure to research everything there is to know about where you’ll be going, and how you will get there. Purchase a backcountry map and study it ahead of time to plan your exact route and a general estimate of how long it should take you. Make use of the thousands of online resources on the internet including videos on YouTube, outdoor blogs, and forums. Inform yourself on what gear you will need and what weather you’ll be expecting for your trip.


4. Don’t pack your gear the morning of your trip
I know from personal experience that packing your gear the morning of, will mean you will be rushing around, making you more likely to forget something. Packing well in advance, allows you to ensure everything is ready to go, and every item is double checked on your list. It will also allow you to leave early in the morning which will give you more travel time to get to your evening campsite or destination.

5. Tell your friends and family where your going and when you’ll be back
Inform someone close to you the plans for your trip including when you’ll be leaving, your trip route and your day of return. This will ensure your safety if something were to happen while you are out in the backcountry. It will also give you peace of mind, allowing you to relax and enjoy your trip.


I hope all of these tips help you in planning your first solo trip in the backcountry. Remember to relax, have fun, and take the time to enjoy every moment. Allow yourself to make mistakes, after all that’s how we learn and develop our skills. Remember that confidence might take time, keep at it and continue pushing yourself to step outside your comfort zone. I promise you that it will bring you a totally different experience of solitude and self empowerment.

Good luck on your journey and Happy Trails.

How to Navigate the Appalachian Trail

Hoping to not get lost on the Appalachian Trail? Let me take you through three resources which will help you immensely on your adventure:

1. 2018 Northbound or Southbound A. T Guide by David “Awol” Miller
I can’t praise this guidebook enough. Before going on the trail I spent quite a bit of time looking up what map/guide to get and everyone recommended this one. It’s easy to see why, it’s incredibly detailed and well thoughtout. It shows milage markers as you hike along and elevation profile maps. It also indicates thousands of landmarks such as campsites, water sources, summits and gaps which makes it super easy to plan your way on the trail. Using the guide book, you can figure out where to stop to re-fill and filter your water, and I used it to check up on how far along I was and how much further there was to go until my shelter for the night. Another great feature of the guidebook is it has tons of info and resources on re-supply points on the trail. It has outlined accommodation details, shuttle services, grocery stores, phone numbers and all the info you need for every trail town. This was so helpful in figuring out what towns to re-supply in.

2. Guthook’s Appalachian Trail Guide App 
When I was on the Trail most people had this awesome app for their phone and I wish I had downloaded it before I left on my trip. Guthook’s map-based smartphone guide doesn’t use any data or require wifi, instead it uses your phones GPS. It shows you where you are on the trail and how close you are to water sources and shelters. It’s free to download but then you have to pay for the maps for the sections of the trail you are hiking. The coolest thing about this app is it tells you exactly how far you are away from landmarks, whereas with the guide book you have to calculate that using math and guessing how far you are in between. So in summary, it will tell you where you are faster than using a guide book. Here’s the kicker: if your phone runs out of battery while on trail then you will be SOL (shit out of luck). So I would encourage not solely depending on the app, instead, bringing a guide book as well. Tips: put your phone on airplane mode to save battery and bring a mini portable charger just in case it runs out before you get to your next re-supply point/trail town.

3. A Compass:
Call me old school but having a compass gave me a huge sense of security on the trail. This is mostly because there is the thought in the back of your head that asks: “What if get completely off the trail somehow and have to find my way in the woods?” Having a compass will at least tell you what direction you’re heading in so that you’re not walking in circles till you eat up all of your ramen noodles rations and die. The trail is super well marked and you have to be pretty stupid to wander off the trail somehow, but having a compass puts me at ease. I got just a simple one from MEC (Mountain Equipment Co-op) but you can use whatever you already own (preferably lightweight).

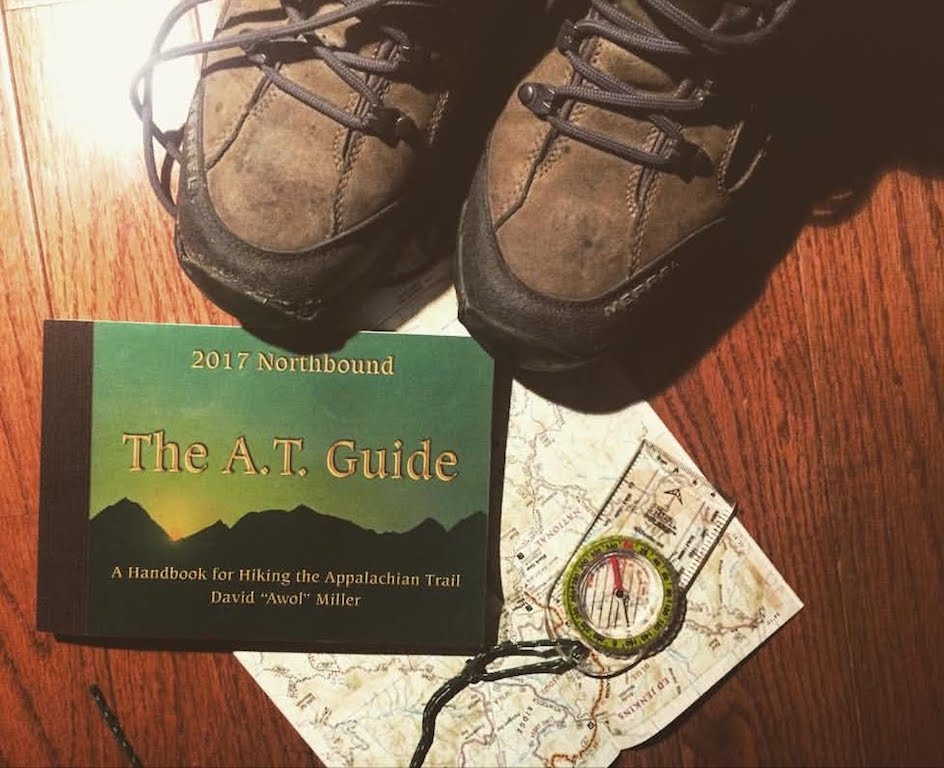
With these three resources on hand you will be all set on navigating your way on the Appalachian Trail. Wishing you a safe and absolutely amazing adventure!

Happy Trails!

5 Reasons the Big Agnes Copper Spur HV UL2 is an Incredible Tent

I purchased my Big Agnus Copper Spur HV UL2 in April 2017 and have completely fallen in love with it. I originally purchased it for my section hike of the Appalachian Trail, as I had done tons of research on lightweight backpacking tents and this one had incredible reviews and everything I was looking for. Not only did I really enjoy it on the trail but have taken it on backcountry canoe trips in Parks across Ontario. I am very happy with my purchase and here’s why this tent meets the mark:

Specs:

Vestibule Area 9 / 9 sqft / 0.8 / 0.8 sqm
Trail Weight 2lb 12oz / 1.25kg
Packed Weight 3lb 1oz / 1.40kg
Packed Size 4″ x 19.5″ / 10 x 50cm
Number of Seasons 3
Number of Doors 2
Head Height 40″ / 102cm
Footprint Weight 6oz / 170g
Floor Area 29 sqft / 2.7 sqm
Fast Fly Weight 964g

1. It’s super lightweight
When picking out a tent it was very important for me for it to be lightweight for long distance backpacking trips. Previously I owned an ancient and super heavy Coleman 3 person tent that I lugged around with me on backcountry trips so this was worth the money to do a major upgrade. Coming in at only 2lb 12oz this so lightweight and fantastic for what it offers. It stored super nicely in my Osprey Aura AG 65 backpack and I was very impressed with how light it felt in my backpack as I hiked.

2. It’s incredibly easy to set up
There’s nothing like being extremely tired from a long day hiking on a trail, or paddling the interior, only have to come to your site for the night and struggle with poles and clips in the dark. Having previously owned tents that were very frustrating to put together, owning the Copper Spur HV UL2 was a breathe of fresh air. The set up is beyond easy to put together, can be done solo in pretty much a minute or two, and I never had any struggles with it long term.


3. The mesh design will blow your mind

The best feature of the Copper Spur HV UL2 is hands down, the two-tone mesh design which starts about halfway up the tent. This allows for privacy but also allows you to take in outdoor sights including the scenery around you or even the stars at night. During the summer months, if I knew it wasn’t going to rain, I loved being able to fall asleep under the stars. Another amazing thing I will note, is this design is great during bug season. Camping in Northern Ontario during the months of May and June means tons of black flies and mosquitoes. This design was perfect for when I needed to escape their wrath. I could lay in my tent with a good book or a cup of coffee and still enjoy the the forest around me and all the critters (like the chipmunk above that came for a little visit).

4. The double door and inside mesh pockets features
One of the major selling points for me were the great features this tent offers. One of these features is the double door design. If you are sleeping with someone else in the tent then this is very important to have. It solves having to crawl over your partner in the middle of the night when you have to pee, and makes it just so much more convenient to get in and out of the tent. Another feature I loved was the 2 interior mesh pockets, and oversized mesh pocket with two cord routing portals. It was perfect to store my books, maps, cellphone, and items I wanted quick access to. It was especially useful for storing my headlamp so I could find it right away in the middle of the night when I needed it. The door and fly design also meant I could unzip and tie the sides to enjoy a cup of coffee in the morning with full view of the forest which was extremely relaxing and gorgeous.

5. It has the perfect amount of space
It was very important for me to get a two person tent because I didn’t want to make a big investment into a gear item that I couldn’t use with my partner or with friends while camping. It was also important to have enough space to be able to stretch out and be comfortable and not feel claustrophobic, which many one-person tents tend to be.  Having a two person was also awesome because it meant that I could sleep with my backpack right beside me if I was solo and have access to everything I needed.

As you can see, the Big Agnes Copper Spur HV UL2 was a fantastic gear choice for me. I can’t recommend this tent enough for ultralight long distance backpacking, thru-hiking, camping, and interior canoe tripping in the backcountry. It’s lasted me through storms, wind, and the all kinds of elements in the spring, summer and fall.

I hope it keeps you warm and dry on all your adventures.

Happy exploring!

The Magic of Killarney: the Story of my Most Memorable Backcountry Canoe Trip

About a year ago I applied for a job at an outdoor gear company and they asked me to write a story about the best outdoor adventure experience I’ve ever had. I ended writing this story and getting the job, and it still remains my most treasured experience in the backcountry. This is that story:

The Magic of Killarney

It’s not everyday one gets to see the northern lights, have a howling match with a lone wolf, laugh hysterically with your best friends around the campfire and then climb the highest peak in a provincial park all in 48 hours.

These magical events, come together to form my best camping story.

This summer I worked at Killarney Provincial Park where I spent the summer educating Park visitors about the history, ecology, and importance of the landscape that inspires outdoor enthusiasts to visit year after year. To say the least, I was obsessed with my job. Every moment of my time was spent exploring the Park, from hiking nature trails, canoeing, fishing, and biking down the highway surrounded by trees and black bears (including one that bluff charged my bike, but that’s another story in itself). Working at Killarney, I knew I had to take advantage of my time in one of the best Parks in Ontario. I proceeded to book solo interior canoe trips for every single day off I had for the months of July and August. I was able to see, and experience some of the most beautiful lakes and camping sites in the Park. Killarney became all that I could speak and think about. I couldn’t contain my excitement when a couple good friends contacted me and said they were coming up for a backcountry adventure. Little did I know, Killarney was creating magic and patiently waiting for their arrival.

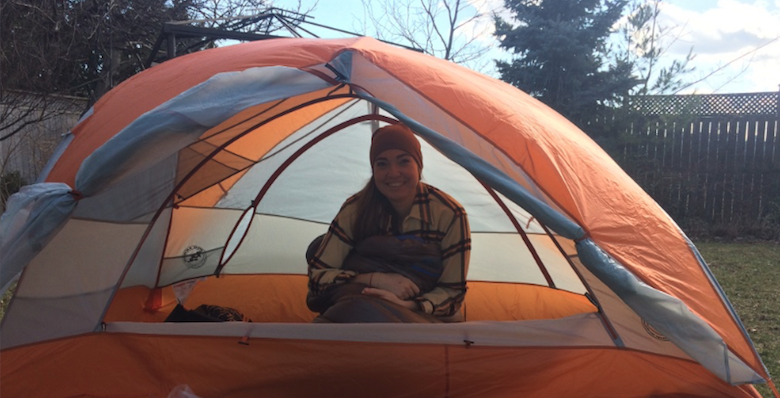
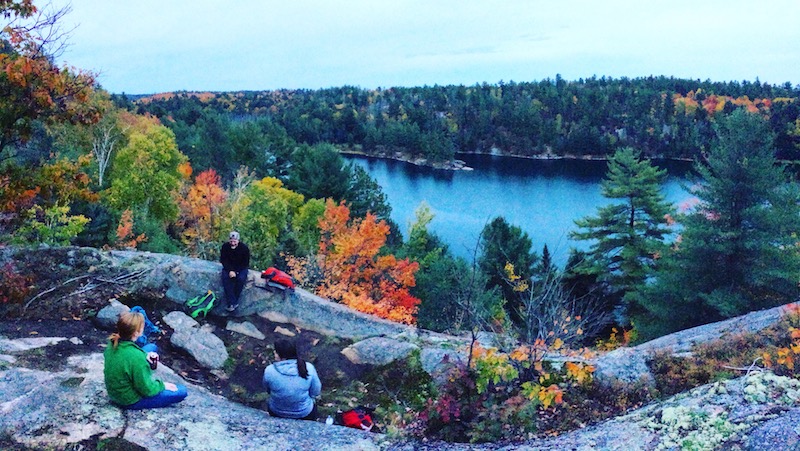
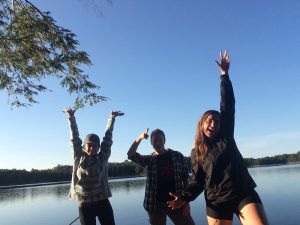
Around 8:00 pm, a coworker burst through the staff house, declaring the northern lights were on full display. I raced out the door to find that sure enough, colours were dancing on the horizon, just in time as my friends made their arrival to Killarney. We couldn’t believe we were witnessing the northern lights together and we took it as a sign of good fortune. That night we camped out together at the town lighthouse, stories of our summers faded into whispers, and eventually we drifted asleep to the sounds of waves from Georgian Bay crashing upon the rocky shore.

In the morning took down camp, loaded up our car, and headed out to Bell Lake. The skies were clear and the sun was shinning, and I was in utter contentment as I was finally sharing with them the landscape I had fallen in love with. After two portages, and paddling three lakes, we finally arrived at our site on David Lake, which was situated on sparkling turquoise water, with the white LaCloche Mountains glimmering in the distance. After a successful and fancy backcountry meal featuring steak, green beans and red wine, we sat around the fire, star gazing, our laughs echoing amongst the rocks and white pine. Mid conversation, we were interrupted by a wolf howl coming from across the lake, we gasped in excitement. One of friends, Jade, had spent the winter working at a wildlife centre with wolves, so she proceeded to have a howling match with the lone wolf. Upon realizing the wolf seemed to be getting closer, we promptly asked her to stop, which gave opportunity for a barred owl to thankfully take over the conversation. We sat on the edge of our site listening to the wolf calls fade, as the moon rose higher in the sky casting a glow on the lake. We turned to each other in disbelief at the utter magic that this trip seemed to be presenting us.

The next morning we awoke, feasting on a filling backcountry breakfast, and packed up our site as fast as we could. We paddled over to a trail head located on a portage connected to David Lake that lead up to the highest elevation in the Park called Silver Peak. Our hiking boots led us along rocky lookouts, forested valleys, and finally up the mountain for the ultimate view at the top. Breathtaking panoramic views of the Park, 
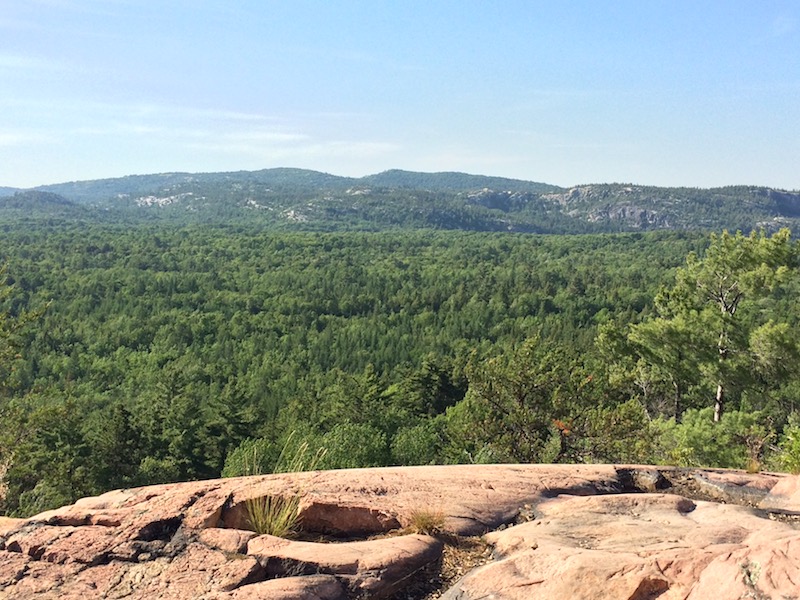
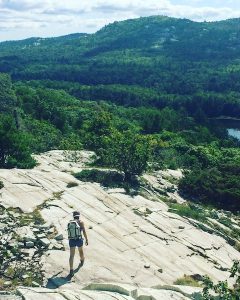
Georgian Bay, Manitoulin Island, and Sudbury left us awestruck. After having our fill of the views, we made out decent back down the trail, finally returning to our canoe and racing into the water to cool down. We were exhausted and still had our return journey back to our entry point to complete. We proceeded to paddle and portage back, encouraging each other and dreaming of the hamburgers we would cook upon our return to civilization. Our three-seater canoe was soon filled with loud singing as we belted out classics and camp songs to help us get through the last stretch.

We arrived at our entry point just as the sun was dropping over the mountains, making it back to civilization just in time for the last order of hamburgers and beers. We recounted the events of the weekend with one another, laughing and eyes glimmering with happiness, we couldn’t believe our luck.

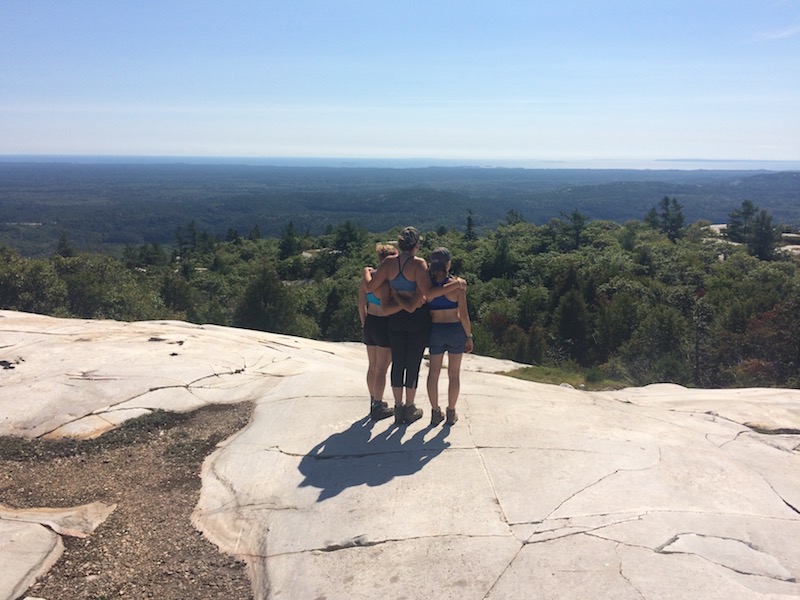
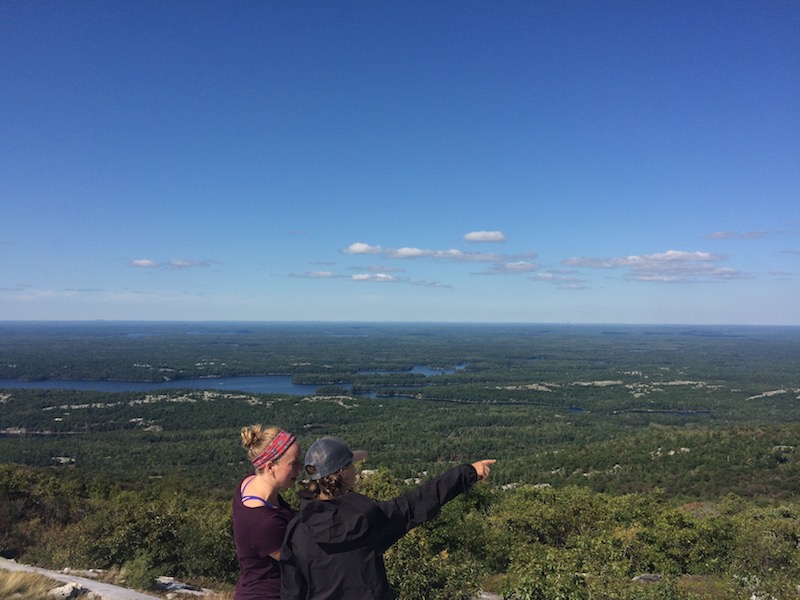
 In the past 48 hours, the Park had presented its best material for my friends, and just like me they had become enraptured with Killarney. It is this reason, that it remains my best camping trip because I was able to share with them this special place that is so dear to my heart.

For more details on interior camping in Killarney Provincial Park check out their website and make sure to trip plan, book your sites online and purchase a Park map.

What’s your most memorable camping trip? Comment Below!

The Top 5 Day Hikes in Killarney Provincial Park

I’ve spent the past 3 seasons exploring every trail and as much of Killarney Provincial Park as possible. These spectacular trails never get old, and never fail to leave me in awe of their stunning views. The trails in the Park vary in distance, difficulty and scenery, but each one can offer you an amazing hiking experience. There is nothing quite like the clear, sparkling lakes surrounded by the white quartzite of the La Cloche Mountain Range.

Plan on visiting Killarney this season? These are the top 5 day hikes I recommend doing:

1. The Crack

Distance: 6 km
Time to hike: 4 hours
Difficulty: Difficult

There’s a reason that the ‘Crack’ has become the most famous trail in Killarney Provincial Park. It’s a bit of a rugged climb and you will be pouring sweat once you get to the top, but the view is beyond worth it. Catch panoramic views of Killarney and O.S.A lake and the stunning La Cloche Mountains surrounding them. I recommend wearing study hiking boots, bringing lots of extra water and some snacks for the top!

2. Silver Peak
Distance: 3 km Paddle, 4 km hike one way
Time to hike: 5 hours + 45 minute paddle there (plan for a full day)
Difficulty: Difficult 

Silver Peak stands at the highest elevation in Killarney Provincial Park so the view at the top allows you to see complete 360 views of the Park, Georgian Bay, Sudbury, and Manitoulin Island in the distance. To access the trail you need to canoe out on Bell Lake to the access point which connects to the La Cloche Silhouette Trail. Make sure you pay attention to trail markers and bring a backcountry map of the Park with you. The trail makes a turn and change in marker colour (blue to red) which leads you straight up to the peak, and if you don’t pay attention to the turn you will end up hiking right past it. I recommend bringing lots of extra water and a lunch for the top, because the hike is strenuous and you will want to take your time soaking in this awe-inspiring view.


3. Chikanishing Trail

Distance: 3 km
Time to hike: 1.5 hours
Difficulty: Moderate

Out of all the trails in Killarney, I’ve done this one the most. It’s the most easy going of the trails and is the perfect day hike when you’re not feeling like climbing some peaks. The first part of the trail takes you along colourful rocks with views of sweeping white pines and Georgian Bay. On the way back, cool down as the trail takes you through the woods and on little wooden boardwalks. Catch glimpses of wild flowers and neat plants along the way, and follow along with interpretive panels about the history of Killarney. I recommend sturdy hiking boots, lots of water, and a bathing suit if you’re feeling like a swim, because the trail takes you to some great swimming spots on Georgian Bay around the halfway point.

4. Granite Ridge

Distance: 2 km
Time to hike: 1 hour
Difficulty: Moderate

A perfect hike if you’re looking for stunning views of the Park, and a shorter, less challenging climb than the Crack or Silver Peak. Hike through the forest, old fields, and then make your way up the rocks to the top. This is my favourite hike to catch the sunset, as you can get back quickly to the start of the trail head before it gets dark (but bring a head lamp just in case). Sturdy hiking shoes and water recommended.

5. Lake of the Woods Trail

Distance: 3.5 km
Time to hike: 3 hours
Difficulty: moderate to difficult

Lake of the woods takes you through the woods, climbing up and down ridges and catching glimpses of the lake below. This is one of my favourite hikes to do in the fall time as the trail is surrounded by deciduous trees so the colours are stunning. To access the trail you have to go for a bit of a drive, as the access point is located down Bell Lake Road (about a 30 minute drive from the Main Office). I recommend good hiking shoes, water, snacks, and good friends to enjoy the views with.

I hope this helps you in planning your visit to Killarney Provincial Park visit their site for more information on Park fees and Park rules and regulations.

What’s your favourite hike in Killarney? Comment below!

Happy Trails!

What Food I Ate on my Section Hike of the Appalachian Trail

Are you researching and prepping your food for your long distance hiking trip? Wondering what types of food to bring that are both lightweight and delicious?

Before I left on my section hike of the Appalachian Trail I found that researching food prep and menus was very helpful and gave me a better idea of what food works best for trail life.

However, once I actually got out on the Appalachian Trail I found that what I thought I would eat on the trail changed greatly. Be prepared to want to chuck ramen noodles off a mountain top on day 3, and be prepared to crave things you’ve never thought you’d ever combine together.

The truth is, you will find that your food preferences are going to change and this is completely personal to what you like and what makes you feel great as you hike. I encourage you to do research on what works the best for your own diet and preferences. If you are mailing your own re-supply boxes, doing your own dehydrating will save you a lot of money. Keep in mind though that you can easily find the food you need at grocery stores located in Trail Towns along the AT. I found trail town re-supply to be the best method for me. For more details on my thoughts on resupply check out my other post here

After finishing my section hike I learned a lot about what foods I liked and what worked the best on the trail. This is my thru-hiking menu:

Breakfast

Instant Coffee- If you’re able to go Gucci, Starbucks is the best. If you’re a little broke, like me, I settled for Nescafe Instant Coffee.

Oatmeal – I went for Quakers Oats, I found that two packets were the best and kept me full and high energy for the morning. I usually did a combo of one flavoured one and a regular packet. That way I didn’t overdue it with the sugar content. Also maple and brown sugar flavor is the best, just sayin’.

Breakfast Healthy Grains- I also had a small packet of grains to add to my oatmeal that included chia seeds, quinoa, hemp seeds, raisons and various super healthy stuff that helped add some nutritious content to my oats! You can find prepackaged ones at health food stores or you can buy them in bulk and combine your own in a ziplock bag.

Cliff Bars- Long term I found that oatmeal took a long time to make in the morning and that if I was in a rush a simple Cliff Bar was the quickest way to start my morning. My favourite kinds were: Peanut Butter Crunch & Chocolate Chip.

Lunch

Wraps- I fell in love with tortilla wraps on the AT. They are like a bundle of love that you wrap up quick and shove into your mouth as you hike. Seriously they will be your new best friends, I promise. Best of all, even when squished in your hiking bag they still taste good. And you can put just about anything on them. Here are the types of wraps I ate:

Tuna Wraps- You can buy the small packages of flakey tuna at the grocery store (not cans), and I grabbed little packets of mayo from fast food places in trail towns and used that for an even tastier wrap!

Peanut Butter wraps- I quickly realized how obsessed I was with peanut butter on the trail. I started off with small packets of it then quickly upgraded to small container that would last me about a week. There’s tons of protein in it, and let’ face it, it tastes incredibly delicious. Trail hack: the little packets you get at breakfast restaurants of Jam and Honey also make a fun addition if you can get your hands on them.

Supper

Backpacker’s Pantry and Mountain House- They tend to be pretty expensive but god are they good. The best part is you don’t have to do dishes because you just toss out the package you cook them in. All you have to do is add boiling water. There’s like a million different meals that come in these pouches and the fun part is testing them out and finding your favourites.

Knorr Sidekick Meals- You can find these at most grocery stores, they are instant packets of pastas, noodles, and rice. Lots of different flavours, are easy to make, and pretty yummy.

Instant Rice, Quinoa, Ramen Noodles- Anything is fair game! The fun part about meal prep is that you can get creative at home dehydrating your own meals or getting creative in what you can combine while you’re in the grocery store.

Snacks

Beef Jerky- I can’t tell you enough how much I became obsessed with beef jerky on the trail. It packs small, and has a lot of protein. Also important to mention, if you eat it in the morning you can close your eyes and pretend it’s bacon. I’ve taste tested a lot of flavours and brands and my personal favourite is Jack Link’s Teriyaki Beef Jerky.  Even better, try making your own if you have a dehydrator.

Dried Mango- This was one of my desserts on the trail. If you like candy or are craving something sweet, it’s a small piece of heaven when you’re out in the woods.

Trail Mix- I tried a bunch of different trail mixes while I was on the AT. My advice is stay away from yogurt chips, they are pretty disgusting. The cheapest way to do it is buy an inexpensive bag of nuts, sunflower seeds, raisons, and then buy a bag of M&Ms and combine it all.

Snicker bars- I heard about snicker bars from bloggers who hiked the AT and they were always raving about them. I can tell you, the hype is real. At the end of a long day, the chocolate and peanut combo refreshed your tired, weary soul and there’s seriously nothing like it.

Green Juice Powder- Living the trail life you’ll often worry about whether you are going to get scurvy or not because your diet does not consist of much fresh fruit or vegetables. I had some individual packets of green juice I brought with me and they were perfect to drink at breakfast or supper when I felt like I was turning into a pirate. You can purchase them at health food stores.

Protein Powder- All about the gains bro! But seriously your body is burning major calories and fat and building muscle in your legs and all over your body. Protein powder helps your muscles grow big and strong and I also found it filled me up when my noodles left me a little hungry. I purchased a Vanilla Hemp Pro from Manitoba Harvest that I picked up at the health food store and loved it.

I hope this list helps you in planning what food to purchase or pick up in your trail towns along the way. Do you have any trail food favourites I haven’t mentioned? Comment below!

Happy Trails.

Why I Preferred Re-Supplying in Trail Towns Instead of Mailing Re-Supply Boxes on my Section Hike of the AT

When first researching thru hiking, the most common idea you will find online is that mailing re-supply boxes or doing bounce boxes is the way to go on the Appalachian Trail. I decided to do my section hike of the AT very last minute and I did not have enough time to prepare boxes and ship them off to my re-supply points. However, once I got on the AT I realized that not doing this was a great decision.

I will take you through my reasoning but before I do I should mention that my opinions are based off of a section hike in Georgia and North Carolina, and that people who have done the entire trail might have a different opinion about this. So I recommend fully researching food options and opinions before coming to a decision on what works best for you. I hope I can provide some insight as to why I think town re-supply works best.

Here are the main reasons I found that not doing mail re-supply worked the best for me:

1) Your Food tastes and cravings change as you hike: my first week of the trail I packed about 7 days worth of food (big mistake as it was so heavy and I could have easily resupplied within 3-4 days). I quickly found that the food items I picked out that I thought I would be eating for the rest of my section hike completely changed within a couple days. You will find that certain food items taste really bad or take too long to cook. You will also find that your body will crave random food items that you never expected in a million years you would want to eat. For example, I originally packed lots of ramen noodles which I thought I would eat for lunches on my trip but when I got out there I found I hated eating them because they took way too long to cook. The reality is, as you hike you will want to keep your momentum going, and stopping to boil water and cook up your noodles is a lot of effort. I found that having a quick tuna wrap or peanut butter wrap worked the best for me because it was easy, tasted great, quick, and gave me lots of energy. I also packed a lot of oatmeal which I loved but long term I realized that making it in the morning took up way too much time and I was better off eating a Cliff Bar or Breakfast Bar instead. If you make the mistake of sending boxes filled with the same type of food items for your thru-hike then you will end up wasting money as you will likely want to give them away to other thru-hikers. Or you may have to spend shipping money sending them as bounce boxes to your next location or quite possibly want to chuck them off a mountain top.

2) The amount of food you consume changes as you hike: I found that my concept of how much I would eat on the trail changed greatly from what I originally had planned out for. As I mentioned before, I packed way too much food for my first week on the trail. You have to keep in mind that your body is going to go through some pretty big changes and that you may loose your appetite or you may get insane hiker-hunger. Your body is burning thousands of calories everyday and you have to make sure you are eating enough food to maintain energy levels and put your health first on the trail. I found that on my 3 weeks on the trail, my appetite decreased. Some days it was smoking hot in the forest and I felt nauseous from hiking non-stop so eating a huge meal was impossible. I preferred lighter snacks like cliff bars, wraps, and backpacking instant meals. Resupplying in trail towns allowed me to adjust my food supply to my needs and not carry extra pack weight with me. However, I met other hikers that found their appetite greatly increased on the trail, as their bodies were searching to replace all the calories they were quickly burning.  So plan for this. I’ve also met hikers who said their hunger increased the longer they were out on the trail for. The bottom line is you can’t predict how your body will react to thru-hiking so keep your options open to account for this. I found town re-supplying instead of mail supply, helped me go along with how I was feeling and my changing appetite levels.

3) Most of your re-supply towns have everything you’re looking for: I was really surprised when I starting hiking the AT at the amenities that small trail town’s along the trail had in their grocery stores. A lot of the trail towns cater to hikers and that means they have a great selection of backpacking meals, instant meals, and anything your heart desires. I had no problem finding all the food I needed in Georgia and North Carolina. However, there may be points along the trail where the re-supply sucks and it is important you research the entire trail as there may be a couple points where mail supply is needed.  It is also important to note that if you have a very specific diet, are vegetarian/vegan, or have any allergies that re-supply will be harder for you in small towns, and that bounce boxes just may be the way to go for you. Overall though, grocery shopping for supplies was super easy and I actually enjoyed exploring the small trail towns and searching for goodies in grocery stores when the hiker-hunger got real.

4) You don’t have to worry about tracking down your box: I really liked not having a set location/town for re-supply as it allowed me to be flexible and stay or stop in whatever town I desired. This allowed me to spontaneously meet up with hiking friends in trail towns and allowed me to adjust my plans based off of my daily energy levels, food needs, and well-being. I never had to worry about small town post-offices or supply posts closing. Instead I just worshipped the hours of the grocery store which tend to be quite lenient.

5) You don’t have to pay expensive shipping fees: As a Canadian, shipping my re-supply boxes to the States means that I would be looking at some pricey fees for shipping. Paying the extra shipping fee wasn’t worth it for me when I can find exactly what I’m looking for in trail towns. I recommend looking into shipping and seeing whether it’s within your thru-hiking budget. If you live in Canada or abroad, it’s something you will want to really take into consideration.

In conclusion, I found that doing re-supply in trail towns instead of mail re-supply worked the best for me on my section hike on the AT. Make sure you research both options and find what works best for you. I hope this helps you in planning your adventure.

Happy Trails!

Powered by WordPress & Theme by Anders Norén