Your Guide to Long Distance Backpacking, Backcountry Canoe Tripping, Hiking, Outdoor Gear and Adventure

Category: Appalachian Trail

The Best Resources to Prep for the Appalachian Trail

Are you dreaming of hiking the Appalachian Trail? Finding the right resources can help you prepare yourself so you ensure you have the right gear, mental attitude, and feel confident in beginning this scary but exciting new adventure.

It has never been easier to prepare for trips like these, as there is so much content on the internet that has been created to share knowledge, experience, and expertise. From podcasts, blogs, forums, books, maps, to YouTube Videos, there is an abundance of information for you to sift through as you plan your section or thru-hike of the Appalachian Trail.

I’ve spent the last couple years looking into resources to plan my section hike and my upcoming thru-hike on the AT. Here are some of the resources I found most helpful:

General Information about the Trail:

Guidebooks and Maps: 

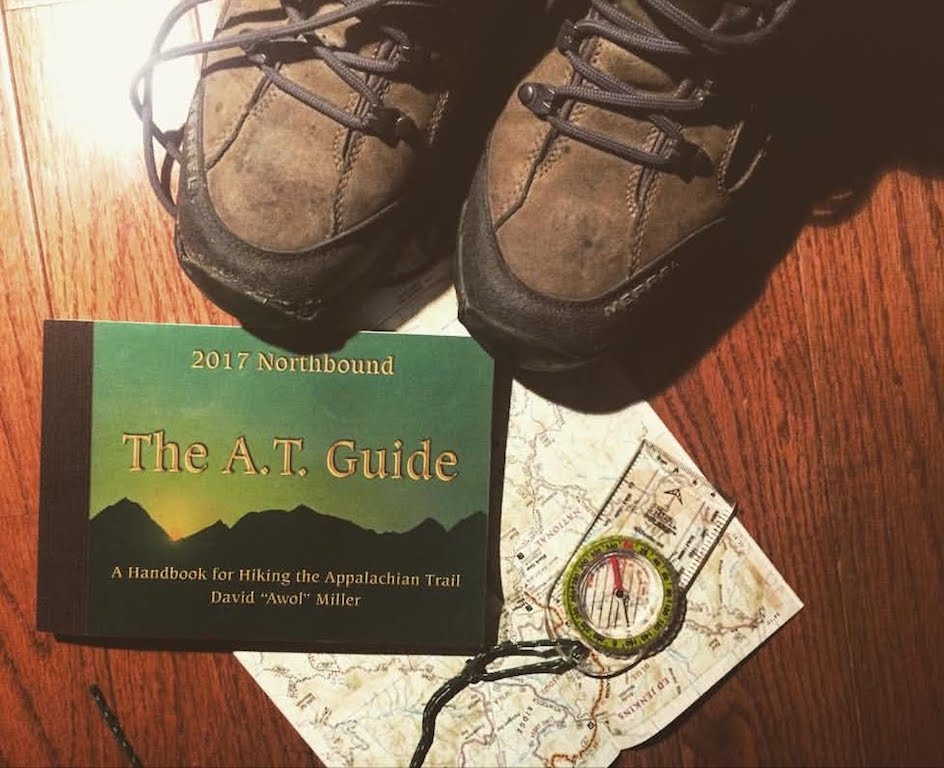
  • Awol’s AT Guide is hands down the best guide book you can get to help plan your trip and use as you hike the Trail. I found it so useful to look over before I left to see when my first re-supply would be and get a sense of the terrain, different Trail towns, water sources, etc.
  • The ATC’s Interactive Map was one of my favourite tools to use in planning my route. The map is so accessible to use and even has layer features which allow you to explore AT parking, shelters, and communities.

Online Forums:

  • Reddit is a wonderful world to dive into as it consists of tons of advice, feedback, experiences and updates on the Trail from users. The two subreddits I follow are: r/appalachiantrail and r/Ultralight
  • WhiteBlaze.net is another great online forum focused on the Appalachian Trail.

Gear Prep: 

  • Outdoor Gear Lab is the best place to get unbiased reviews of outdoor gear as they have outdoor enthusiasts and experts test out the product lines of major outdoor companies every single year. They have such a comprehensive review rating system that helps you focus on specifically what you are looking for. For example, if I am looking for a new backpacking tent, they outline the best overall product, the lightest option, and the ‘Best bang for your buck’ product. This helps me narrow down the product qualities I’m seeking. Before I purchase a new gear item I always read the reviews on this website first.
  • LighterPack is an incredible resource that allows you to put together your gear list for your trip. By imputing and calculating the overall weights, it’s a useful tool to make sure you have a good base weight. It also helps me be more critical of my gear list and eliminate items I don’t really ‘need.’

Blogs:

  • The Trek is one of the best blogs to check out for Appalachian Trail content. Their website has so many useful resources and can probably cover most of the topics on this list. If you’re interested in long distance backpacking, it’s the website you should be following.

Youtube Videos:

  • Homemade Wanderlust is my favourite Appalachian Trail Youtuber. She has great videos on gear advice, and helpful tips for life on the trail.
  • Darwin Onthetrail great long distance backpacking videos as well. I also enjoy how he’s created content on backpacking gear for those who are on a tight budget.

Podcasts: 

  • Mighty Blue on the Appalachian Trail is a great podcast run by a former thru-hiker on the AT who interviews hikers about their experiences. The host Steve Adams, has a smooth British accent which makes interviews so enjoyable and calming to listen to. I loved to listen to them on Spotify on my commute to work every morning.

Books:

Time to hit the dusty trail

I hope you find these resources as helpful as I did in preparing for my hike on the Appalachian Trail. Of course, there are so many other helpful resources out there, these are just my personal favourites. Go on and dive right into the worm hole of the internet and have fun prepping for your adventure of a lifetime. Happy Trails!


How to Navigate the Appalachian Trail

Hoping to not get lost on the Appalachian Trail? Let me take you through three resources which will help you immensely on your adventure:

1. 2018 Northbound or Southbound A. T Guide by David “Awol” Miller
I can’t praise this guidebook enough. Before going on the trail I spent quite a bit of time looking up what map/guide to get and everyone recommended this one. It’s easy to see why, it’s incredibly detailed and well thoughtout. It shows milage markers as you hike along and elevation profile maps. It also indicates thousands of landmarks such as campsites, water sources, summits and gaps which makes it super easy to plan your way on the trail. Using the guide book, you can figure out where to stop to re-fill and filter your water, and I used it to check up on how far along I was and how much further there was to go until my shelter for the night. Another great feature of the guidebook is it has tons of info and resources on re-supply points on the trail. It has outlined accommodation details, shuttle services, grocery stores, phone numbers and all the info you need for every trail town. This was so helpful in figuring out what towns to re-supply in.

2. Guthook’s Appalachian Trail Guide App 
When I was on the Trail most people had this awesome app for their phone and I wish I had downloaded it before I left on my trip. Guthook’s map-based smartphone guide doesn’t use any data or require wifi, instead it uses your phones GPS. It shows you where you are on the trail and how close you are to water sources and shelters. It’s free to download but then you have to pay for the maps for the sections of the trail you are hiking. The coolest thing about this app is it tells you exactly how far you are away from landmarks, whereas with the guide book you have to calculate that using math and guessing how far you are in between. So in summary, it will tell you where you are faster than using a guide book. Here’s the kicker: if your phone runs out of battery while on trail then you will be SOL (shit out of luck). So I would encourage not solely depending on the app, instead, bringing a guide book as well. Tips: put your phone on airplane mode to save battery and bring a mini portable charger just in case it runs out before you get to your next re-supply point/trail town.

3. A Compass:
Call me old school but having a compass gave me a huge sense of security on the trail. This is mostly because there is the thought in the back of your head that asks: “What if get completely off the trail somehow and have to find my way in the woods?” Having a compass will at least tell you what direction you’re heading in so that you’re not walking in circles till you eat up all of your ramen noodles rations and die. The trail is super well marked and you have to be pretty stupid to wander off the trail somehow, but having a compass puts me at ease. I got just a simple one from MEC (Mountain Equipment Co-op) but you can use whatever you already own (preferably lightweight).

With these three resources on hand you will be all set on navigating your way on the Appalachian Trail. Wishing you a safe and absolutely amazing adventure!

Happy Trails!

What Food I Ate on my Section Hike of the Appalachian Trail

Are you researching and prepping your food for your long distance hiking trip? Wondering what types of food to bring that are both lightweight and delicious?

Before I left on my section hike of the Appalachian Trail I found that researching food prep and menus was very helpful and gave me a better idea of what food works best for trail life.

However, once I actually got out on the Appalachian Trail I found that what I thought I would eat on the trail changed greatly. Be prepared to want to chuck ramen noodles off a mountain top on day 3, and be prepared to crave things you’ve never thought you’d ever combine together.

The truth is, you will find that your food preferences are going to change and this is completely personal to what you like and what makes you feel great as you hike. I encourage you to do research on what works the best for your own diet and preferences. If you are mailing your own re-supply boxes, doing your own dehydrating will save you a lot of money. Keep in mind though that you can easily find the food you need at grocery stores located in Trail Towns along the AT. I found trail town re-supply to be the best method for me. For more details on my thoughts on resupply check out my other post here

After finishing my section hike I learned a lot about what foods I liked and what worked the best on the trail. This is my thru-hiking menu:

Breakfast

Instant Coffee- If you’re able to go Gucci, Starbucks is the best. If you’re a little broke, like me, I settled for Nescafe Instant Coffee.

Oatmeal – I went for Quakers Oats, I found that two packets were the best and kept me full and high energy for the morning. I usually did a combo of one flavoured one and a regular packet. That way I didn’t overdue it with the sugar content. Also maple and brown sugar flavor is the best, just sayin’.

Breakfast Healthy Grains- I also had a small packet of grains to add to my oatmeal that included chia seeds, quinoa, hemp seeds, raisons and various super healthy stuff that helped add some nutritious content to my oats! You can find prepackaged ones at health food stores or you can buy them in bulk and combine your own in a ziplock bag.

Cliff Bars- Long term I found that oatmeal took a long time to make in the morning and that if I was in a rush a simple Cliff Bar was the quickest way to start my morning. My favourite kinds were: Peanut Butter Crunch & Chocolate Chip.

Lunch

Wraps- I fell in love with tortilla wraps on the AT. They are like a bundle of love that you wrap up quick and shove into your mouth as you hike. Seriously they will be your new best friends, I promise. Best of all, even when squished in your hiking bag they still taste good. And you can put just about anything on them. Here are the types of wraps I ate:

Tuna Wraps- You can buy the small packages of flakey tuna at the grocery store (not cans), and I grabbed little packets of mayo from fast food places in trail towns and used that for an even tastier wrap!

Peanut Butter wraps- I quickly realized how obsessed I was with peanut butter on the trail. I started off with small packets of it then quickly upgraded to small container that would last me about a week. There’s tons of protein in it, and let’ face it, it tastes incredibly delicious. Trail hack: the little packets you get at breakfast restaurants of Jam and Honey also make a fun addition if you can get your hands on them.

Supper

Backpacker’s Pantry and Mountain House- They tend to be pretty expensive but god are they good. The best part is you don’t have to do dishes because you just toss out the package you cook them in. All you have to do is add boiling water. There’s like a million different meals that come in these pouches and the fun part is testing them out and finding your favourites.

Knorr Sidekick Meals- You can find these at most grocery stores, they are instant packets of pastas, noodles, and rice. Lots of different flavours, are easy to make, and pretty yummy.

Instant Rice, Quinoa, Ramen Noodles- Anything is fair game! The fun part about meal prep is that you can get creative at home dehydrating your own meals or getting creative in what you can combine while you’re in the grocery store.

Snacks

Beef Jerky- I can’t tell you enough how much I became obsessed with beef jerky on the trail. It packs small, and has a lot of protein. Also important to mention, if you eat it in the morning you can close your eyes and pretend it’s bacon. I’ve taste tested a lot of flavours and brands and my personal favourite is Jack Link’s Teriyaki Beef Jerky.  Even better, try making your own if you have a dehydrator.

Dried Mango- This was one of my desserts on the trail. If you like candy or are craving something sweet, it’s a small piece of heaven when you’re out in the woods.

Trail Mix- I tried a bunch of different trail mixes while I was on the AT. My advice is stay away from yogurt chips, they are pretty disgusting. The cheapest way to do it is buy an inexpensive bag of nuts, sunflower seeds, raisons, and then buy a bag of M&Ms and combine it all.

Snicker bars- I heard about snicker bars from bloggers who hiked the AT and they were always raving about them. I can tell you, the hype is real. At the end of a long day, the chocolate and peanut combo refreshed your tired, weary soul and there’s seriously nothing like it.

Green Juice Powder- Living the trail life you’ll often worry about whether you are going to get scurvy or not because your diet does not consist of much fresh fruit or vegetables. I had some individual packets of green juice I brought with me and they were perfect to drink at breakfast or supper when I felt like I was turning into a pirate. You can purchase them at health food stores.

Protein Powder- All about the gains bro! But seriously your body is burning major calories and fat and building muscle in your legs and all over your body. Protein powder helps your muscles grow big and strong and I also found it filled me up when my noodles left me a little hungry. I purchased a Vanilla Hemp Pro from Manitoba Harvest that I picked up at the health food store and loved it.

I hope this list helps you in planning what food to purchase or pick up in your trail towns along the way. Do you have any trail food favourites I haven’t mentioned? Comment below!

Happy Trails.

Why I Preferred Re-Supplying in Trail Towns Instead of Mailing Re-Supply Boxes on my Section Hike of the AT

When first researching thru hiking, the most common idea you will find online is that mailing re-supply boxes or doing bounce boxes is the way to go on the Appalachian Trail. I decided to do my section hike of the AT very last minute and I did not have enough time to prepare boxes and ship them off to my re-supply points. However, once I got on the AT I realized that not doing this was a great decision.

I will take you through my reasoning but before I do I should mention that my opinions are based off of a section hike in Georgia and North Carolina, and that people who have done the entire trail might have a different opinion about this. So I recommend fully researching food options and opinions before coming to a decision on what works best for you. I hope I can provide some insight as to why I think town re-supply works best.

Here are the main reasons I found that not doing mail re-supply worked the best for me:

1) Your Food tastes and cravings change as you hike: my first week of the trail I packed about 7 days worth of food (big mistake as it was so heavy and I could have easily resupplied within 3-4 days). I quickly found that the food items I picked out that I thought I would be eating for the rest of my section hike completely changed within a couple days. You will find that certain food items taste really bad or take too long to cook. You will also find that your body will crave random food items that you never expected in a million years you would want to eat. For example, I originally packed lots of ramen noodles which I thought I would eat for lunches on my trip but when I got out there I found I hated eating them because they took way too long to cook. The reality is, as you hike you will want to keep your momentum going, and stopping to boil water and cook up your noodles is a lot of effort. I found that having a quick tuna wrap or peanut butter wrap worked the best for me because it was easy, tasted great, quick, and gave me lots of energy. I also packed a lot of oatmeal which I loved but long term I realized that making it in the morning took up way too much time and I was better off eating a Cliff Bar or Breakfast Bar instead. If you make the mistake of sending boxes filled with the same type of food items for your thru-hike then you will end up wasting money as you will likely want to give them away to other thru-hikers. Or you may have to spend shipping money sending them as bounce boxes to your next location or quite possibly want to chuck them off a mountain top.

2) The amount of food you consume changes as you hike: I found that my concept of how much I would eat on the trail changed greatly from what I originally had planned out for. As I mentioned before, I packed way too much food for my first week on the trail. You have to keep in mind that your body is going to go through some pretty big changes and that you may loose your appetite or you may get insane hiker-hunger. Your body is burning thousands of calories everyday and you have to make sure you are eating enough food to maintain energy levels and put your health first on the trail. I found that on my 3 weeks on the trail, my appetite decreased. Some days it was smoking hot in the forest and I felt nauseous from hiking non-stop so eating a huge meal was impossible. I preferred lighter snacks like cliff bars, wraps, and backpacking instant meals. Resupplying in trail towns allowed me to adjust my food supply to my needs and not carry extra pack weight with me. However, I met other hikers that found their appetite greatly increased on the trail, as their bodies were searching to replace all the calories they were quickly burning.  So plan for this. I’ve also met hikers who said their hunger increased the longer they were out on the trail for. The bottom line is you can’t predict how your body will react to thru-hiking so keep your options open to account for this. I found town re-supplying instead of mail supply, helped me go along with how I was feeling and my changing appetite levels.

3) Most of your re-supply towns have everything you’re looking for: I was really surprised when I starting hiking the AT at the amenities that small trail town’s along the trail had in their grocery stores. A lot of the trail towns cater to hikers and that means they have a great selection of backpacking meals, instant meals, and anything your heart desires. I had no problem finding all the food I needed in Georgia and North Carolina. However, there may be points along the trail where the re-supply sucks and it is important you research the entire trail as there may be a couple points where mail supply is needed.  It is also important to note that if you have a very specific diet, are vegetarian/vegan, or have any allergies that re-supply will be harder for you in small towns, and that bounce boxes just may be the way to go for you. Overall though, grocery shopping for supplies was super easy and I actually enjoyed exploring the small trail towns and searching for goodies in grocery stores when the hiker-hunger got real.

4) You don’t have to worry about tracking down your box: I really liked not having a set location/town for re-supply as it allowed me to be flexible and stay or stop in whatever town I desired. This allowed me to spontaneously meet up with hiking friends in trail towns and allowed me to adjust my plans based off of my daily energy levels, food needs, and well-being. I never had to worry about small town post-offices or supply posts closing. Instead I just worshipped the hours of the grocery store which tend to be quite lenient.

5) You don’t have to pay expensive shipping fees: As a Canadian, shipping my re-supply boxes to the States means that I would be looking at some pricey fees for shipping. Paying the extra shipping fee wasn’t worth it for me when I can find exactly what I’m looking for in trail towns. I recommend looking into shipping and seeing whether it’s within your thru-hiking budget. If you live in Canada or abroad, it’s something you will want to really take into consideration.

In conclusion, I found that doing re-supply in trail towns instead of mail re-supply worked the best for me on my section hike on the AT. Make sure you research both options and find what works best for you. I hope this helps you in planning your adventure.

Happy Trails!

Powered by WordPress & Theme by Anders Norén